Wednesday, January 6, 2016

New Start

I've come back today to officially say goodbye to Maddyanne Designs. It's hard to believe that I started writing this blog almost exactly seven years ago for the benefit of my fellow Etsiers. My how time passes by!

Things have changed drastically in my life over the years. And with those changes, I sadly fell out of the loop of posting. Recently, I started anew with a blog geared toward writing, books, and a sprinkle of posts similar to Maddyanne Designs (Etsy finds, house/life, etc.) at www.madelinemeekins.com.

Also, exciting news!! I wrote a young adult book called Jamyria: The Entering. A free sample that includes the first seven chapters is available, if you'd like to check it out.

Freshly marked with power upon entering the alternate world of Jamyria, Margo Grisby explores vibrant forests, battles unimaginable beings, and seeks out the world's darkest secrets. Together with her friends, she must find the Witch hidden amidst the forest in the hopes of discovering an escape while outrunning the world’s creator and her guardsmen. 

AVAILABLE ON: AMAZON KINDLE / BARNES & NOBLE NOOK / IBOOKS / KOBO / SCRIBD / SMASHWORDS

Visit my new blog www.madelinemeekins.com/blog.

Sunday, April 7, 2013

Where have I been?


It may seem like a mystery to you. For someone who posted nearly daily to just disappear is practically unheard of! Did I slip away into the crowd behind the safety of inconspicuous facial hair? That would be absurd, as I am female. Perhaps I wore a paper monocle, a top hat, and bright red lips while hiding behind a delicious-looking paper lollipop. 


That is also inaccurate! Honestly, I don't know what happened. One minute I'm saying, "I'll definitely start blogging again," and then after one or two posts life gets busy and suddenly its been another two months. Sigh. I suppose I can't promise much this time, but I can say that I hope to not run away shamefully behind a mask like the last time.

Oh and just for laughs...


I always used to sneak onto ebay as a kid and dream of becoming a spy with a vintage mini spy cam like this one. Oh, Maddy... You were so young...


Monday, October 24, 2011

it's fall!

It's fall, ladies and gents!  And I'm loving every minute of it.  Fall is by far my favorite time of year, and to celebrate the season, I've been on a decorating rampage this past week.  Today (thanks to some Young House Love pumpkin inspiration) I stenciled and painted a few pumpkins.


I'm feeling surprisingly spook-tacular this year.  Most years I just want to set out pumpkins and roll around in the hay dreaming of the good ole days out in the country.  But this time around, I really feeling whipping out the Jason mask and scaring the mess out of the neighborhood kids.  And, no, I'm not holding a grudge over the pumpkins they stole/smashed.  I just REALLY feel like being scary this year (a difficult feat for one whose talents include smiling for no apparent reason).

Besides pumpkin painting, the fam got together for a few holiday crafts (which will be shared in a separate post), and I also had fun decorating my freshly hung Ikea Lack shelves over our kitchen table.


Here's a shot of the end result.  Yay, Halloween! :)

Everything was already owned except three new editions and the leaves from a floral arrangement in the living room.  The birdcage and clock are newly thrifted items.  I found the clock at Goodwill for just under five bucks.  And, bonus, it works!  The birdcage is from a yard sale in my neighborhood.  The lady I bought it from was moving and had it marked for just a dollar!  I've always wanted to decorate with a birdcage, so I have lots of plans for it after Halloween.


The last thing is Mr. Spider hanging out by our white cross.  This was one of the easiest projects.

A friend of mine gave me this picture frame as a gift.  All it is is two pieces of acrylic with magnets.  You just pull it apart, slip your artwork in, and slap the other piece on top.  The only thing was the picture was a bit summery, so I've decided to rotate the artwork according to the season.

I started out by simply drawing the outline of the frame on a plain piece of computer paper.


Next I drew a simple spider in the center of the paper, colored it with a black marker, and (wait for it...) cut it out.


Voila!  Simple, very scary, experimental-ish Halloween art.  Cost: zero dollars!


So far, I'm loving our Halloween decor.  It almost makes me want to throw a Halloween bash.  Almost.  Stay tuned for crafts and costumes!


Monday, October 10, 2011

shopping for real


For the first time in an embarrassingly long time, I'm shopping for clothes!  It's quite sad to have posted so many fashion idea posts and to finally admit that I'm pretty much a "fashion don't" in real life.  I supposed I've just let myself go as they say about a lot of moms.  Between work, school, family, and a... (what's that thing called?  Oh, yeah!) a life, I've sort of lost touch with reality and have just made do with what I've had.

So I've finally decided to break down and start my wardrobe over!  Yay...?  Well, here are some ideas I have so far from Target.  But as my husband so kindly pointed out, it's a lot of solid colors.  But with some jewelry or a nice scarf, I think I can make it work.  Anyway it's a start.

Has anyone else had a makeover/intervention?  Do share!  I'd rather not go through this alone.

Friday, September 9, 2011

shopping for pretend, fires for real


Ahh, fall is in the air.  Psych!  Not in Texas, at least.  The temperature has dropped oh-so-slightly but it's still getting pretty hot during the daytime.  A girl can dream, though.  Maybe if I buy all of the pretty items, fall will make it's grand appearance.  Lord knows we need the cold!  This summer has been extremely hot and dry.  I don't think we've had any rain since spring other than a light drizzle back in June.

And now we've had these crazy fires!  If you can, there are websites to donate to the fire victims.  Check out this crazy video:


It's crazy to think that that's just a city over from us.  This fire in Bastrop, TX is by far the largest of them, but they've been popping up all over the place.  There's so much smoke settled in the city that I thought I was driving through fog yesterday morning.  It honestly looks like the smog you see in bigger cities.  Insane...

But onto happier things, I'm loving this outfit here.  The anthropologie sweater started the whole thing up.  And after seeing the pretty teal color, I realized it reminded me of this jar I thrifted a while back which now holds a lovely bouquet of bright orange fall leaves, hence the need for orange accessories.  Check out the items at their sources below.

1. Filled Echelons Peacoat by Anthropologie - $148
2. Moonstone Earrings by hildes - $28
3. New Shadyside Backpack by ErikaElynCreations - $115
4. Handmade Fringe Boots by letuspaint - $36

Thursday, September 8, 2011

tiny upgrade, tiny shelf

One of my favorite hobbies is thrifting.  My daughter and I take weekly trips to Goodwill, and while I usually hope to find a particular item (right now I'm looking for unique end tables to refinish in our living room), I go in with an open mind.  I try not to go overboard and buy stuff that's completely out there.  I keep my infamous wish list in mind when I shop.

A few weeks ago, I crossed a minor bathroom upgrade off my list: "add a small shelf over the toilet." This particular bathroom is a little awkward since it's our half bath that sits under the stairs.  The toilet is sort of set back in a nook.  The whole room seems dark and cramped.  We'll work on fixing that problem later on.  For now, I found this dinky little shelf for $3.99 at Goodwill.


She's really not in horrible condition, but there were several scruff marks and scratches that I wasn't too fond of.  

But I was digging the pewter scrolly things.  So I whipped out my tiny screwdriver and removed all sixteen of those little buggers.  


Three coats of metallic spray paint did the trick.  I let it dry for about an hour (I know, it should have let it sit for at least the night, but I'm impatient when it comes to DIYing) and screwed everything back together.

And voila!  A darling little shelf, revived with a total cost of about five buckaroos.


But I sigh.  For it did not hang quite as easily as anticipated.  There are several holes laughing at me from behind the shelf.  In the end, I'm loving the little addition to our toilet nook.  Even if the only thing on it right now is a random candle I found in the laundry room.  What's ironic is that I just bought two sets of shelves (who also seem to be laughing at me for reasons I will soon explain) and I honestly don't have anything to fill them with yet either.  One thing at a time, I suppose.


So.... Puzzle of the day: If anyone has advice on how to hang an Ikea Lack floating shelf without hardware, please let me know!

Wednesday, September 7, 2011


Another post over on the old blog:
———
So it’s been a while since I’ve posted, but that’s because I’ve been so busy at home making curtains!  I went into this project expecting to be finished in a day.  Ha!  As I’ve mentioned before, I’m not exactly the best sewer, but now I’m a sewing machine (get it?).  A while back I pinnedthese awesome curtains on Pinterest.  I’ve had my eye on chevron curtains for a while, and I finally built up the courage to make them myself.  I found this light blue and natural chevron:
fabric.com, chevron, blue, natural, tan
And this super mod yellow damask:
yellow, damask, fabric.com
I ordered 15 yards of the chevron for about $7.50 a yard (I ended up splitting the fabric down the middle for the two small windows so I actually have 5 extra yards) and 2 yards of the damask for about $8.50 a yard.  When I viewed my shopping cart I was a bit bummed out (at least shipping was free since the order was over $35), but after some quick Googling, I found a 15% off coupon bringing the grand total to $109 and some change.  Still a lot, but better than the $200+ for one pair of panels.
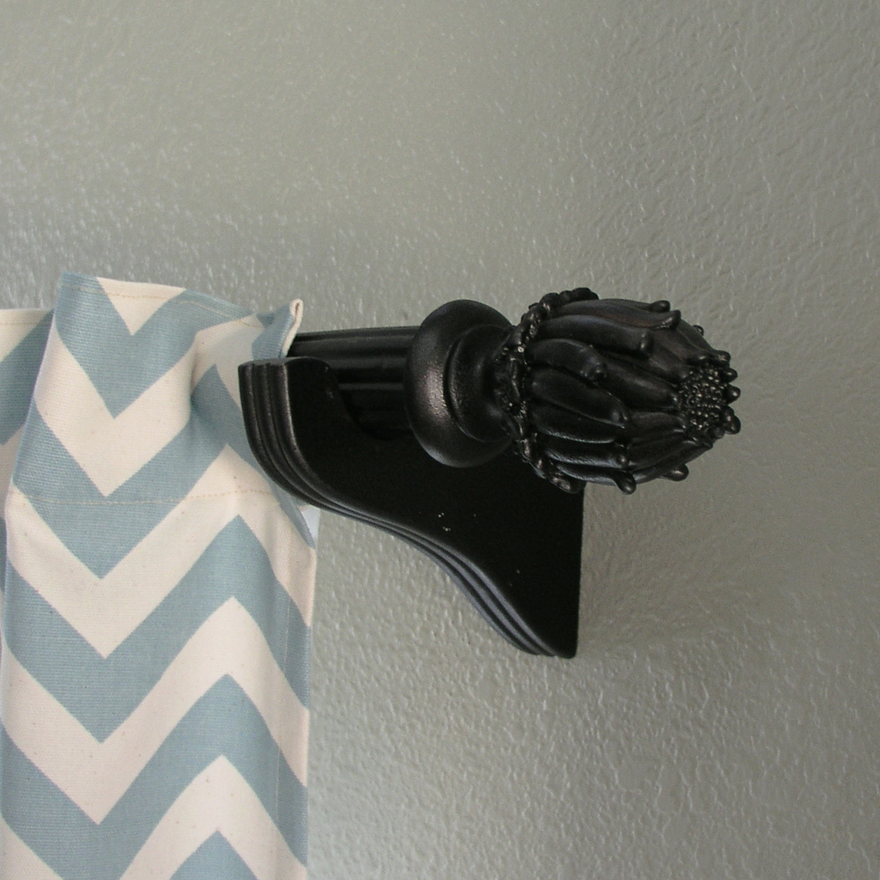
I also picked up some matching thread and ribbon (will explain later) from Hobby Lobby.  As for the curtain rods, I was given some very nice ones when I worked at a fabric store a while back.  They were on clearance and my manager got tired of the clutter in the store and let each employee pick out ten items each!  I went for these sunflower finials and rod set by Menagerie.  The problem was one rod was too short for my larger window.  After years of them sitting in my closet, I finally decided that I didn’t need them to match perfectly.  A quick trip to Lowes and nine bucks later and I had a dowel cut to the right length.  I doesn’t have the same grooves in it that the other rod does, but I spray painted everything a nice ORB (yup, busted out the oil-rubbed-bronze that Young House Love subliminally embedded in my mind).
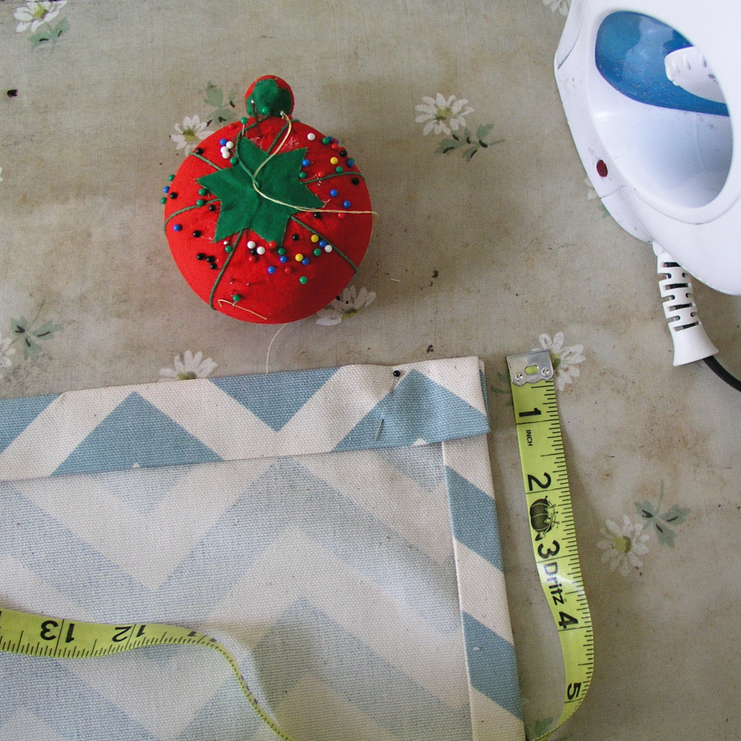
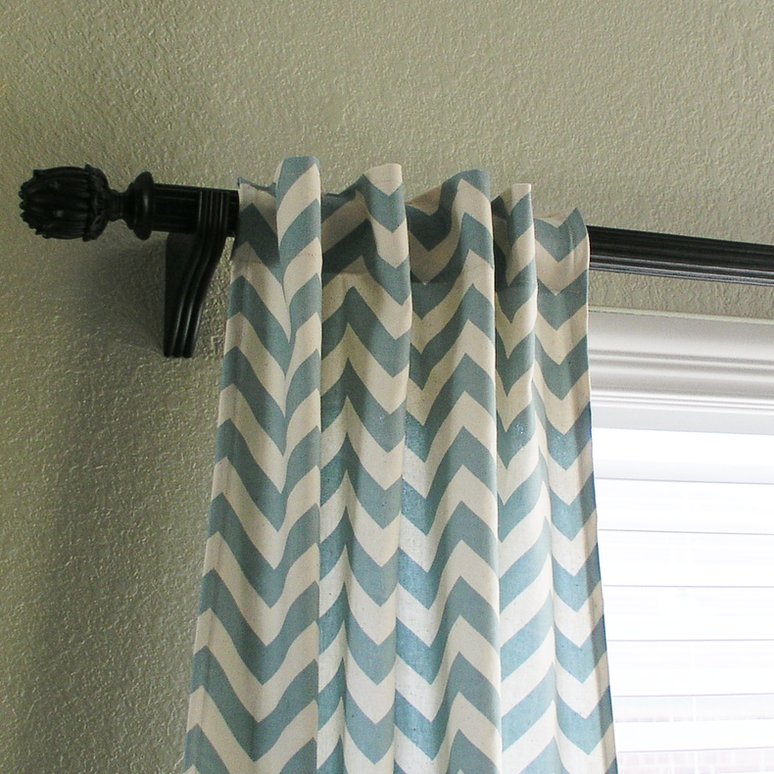
But back to the curtains, I basically just ironed a hem on all the edges, and a thicker hem on the bottom.
curtain tutorial
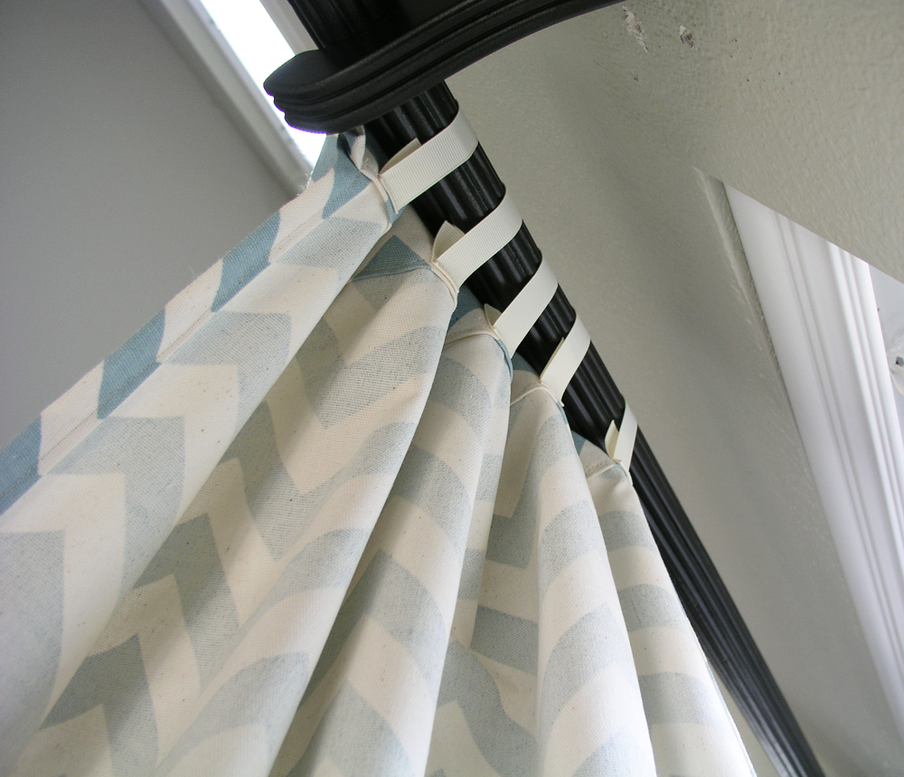
The top hem was a little different. I’m not a fan of the gathered curtains and wanted something a little different than clip-on rings.  I decided to go for the hidden tab look like the curtains in my bedroom.  Here’s where the ribbon comes into play.  After ironing a three inch hem on the top, I cut five strips of ribbon and ironed them into 3 1/2 inch strips.
hidden tab tutorial
Then I pinned them across the top letting them bunch up in the center for breathing room once they’re on the rod.
And here’s what they look like after they’re sewn and nice and trimmed up.
You can see when they’re hung they create this nice, almost pleated effect.  Neat and crisp, in my opinion.
Here’s a close up of the finials I’m just in love with and so excited to finally use!  They’re blooming sunflowers…just a little happy detail. :)
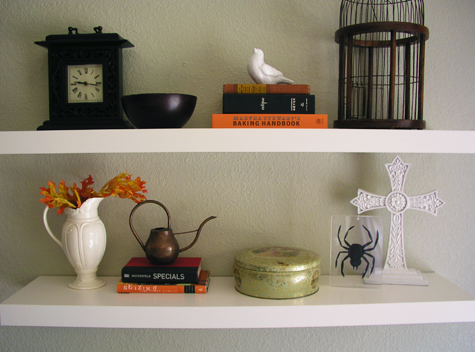
Just for laughs, here’s the before picture I captured a few months ago.
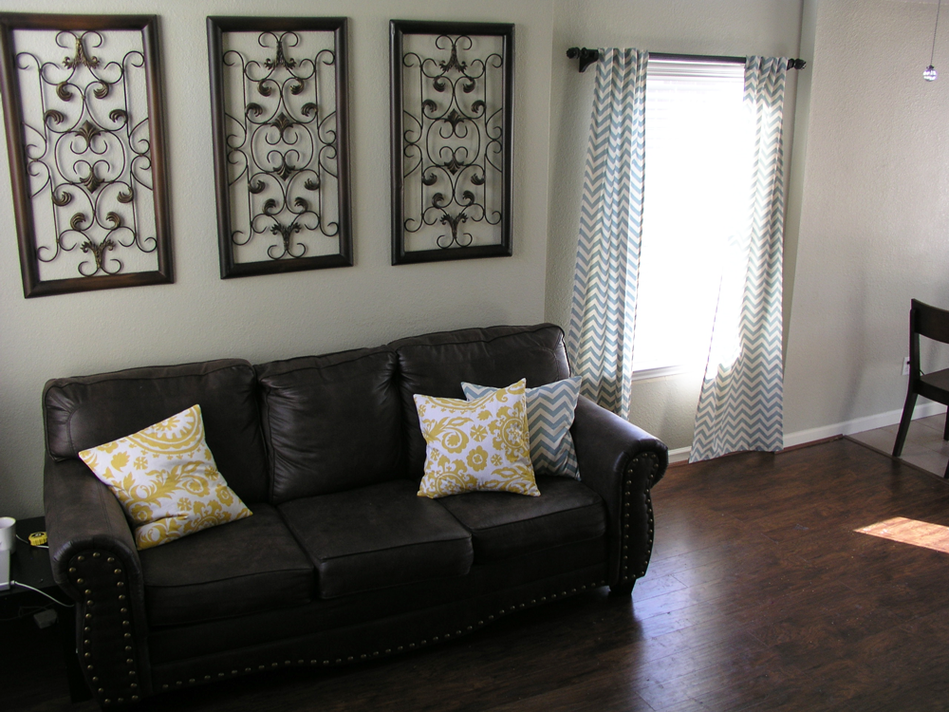
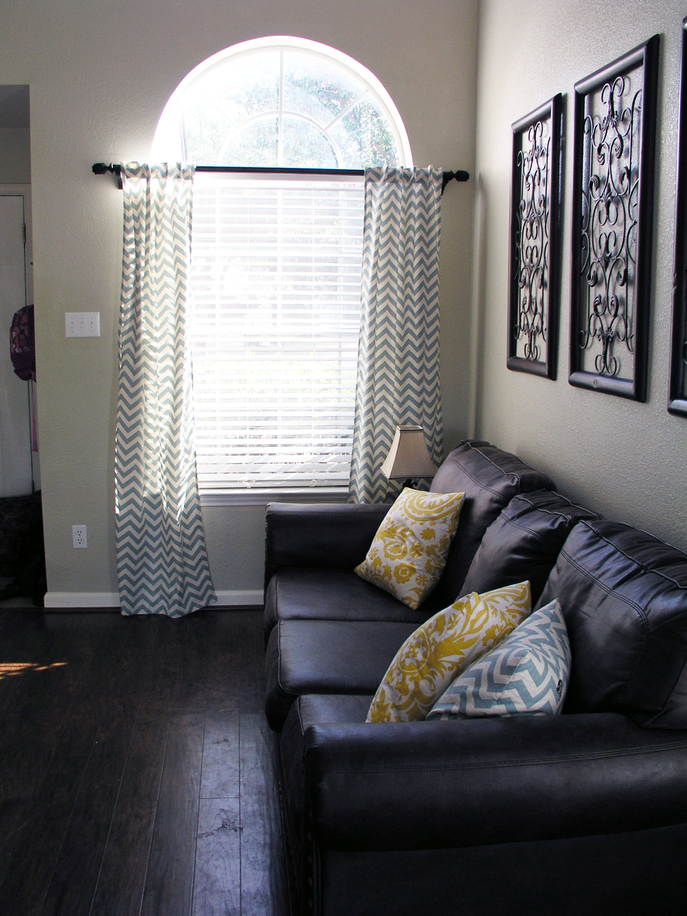
And here’s the progress so far:
I admit, not a lot’s changed.  But it’s a great start! The little amount of color we’ve added has gone a long way.
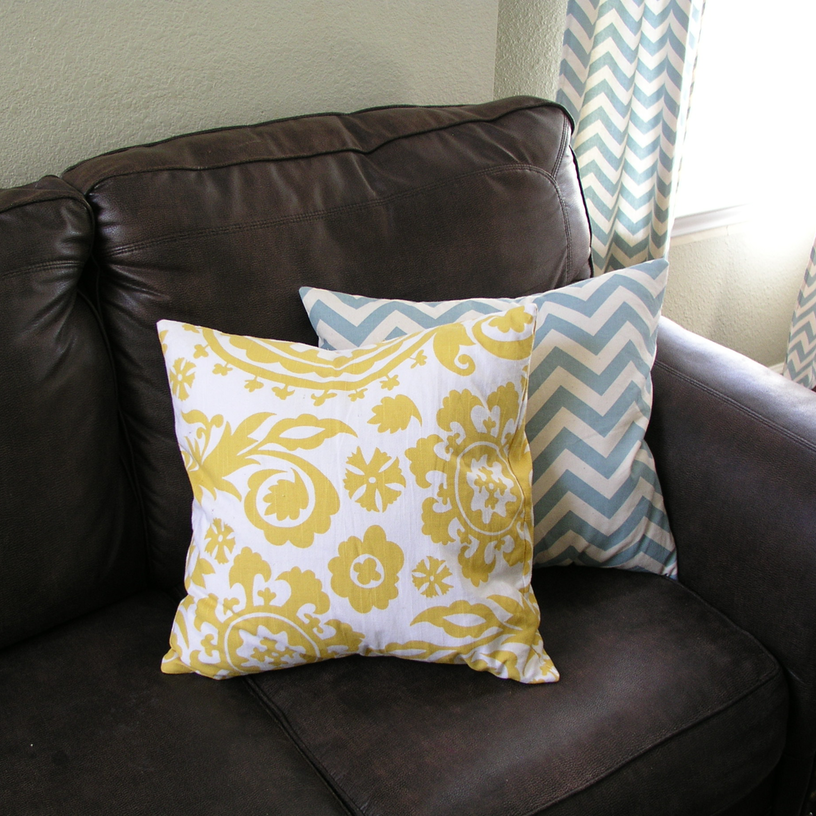
Oh and so far the yellow fabric has only gone to a pair of pillows on our couch.
In addition to the two pairs of curtains in the living room, I made one big curtain for our sliding glass door, complete with grommets, and a small pair for over our kitchen sink (will take pictures).
As for the budget…
Budget Breakdown:
Fabric (we only ended up using about 10 yards plus 15% off coupon and free shipping) – 63.75
Thread – $2.79
Ribbon – $1.99
Spray paint for curtain rods – about $6.00
Dowel for curtain rod – about $9.00
Grand Total – $83.53
Not bad considering we got four sets of curtains out of it!  There’s still plenty to do in the living room.  I’ll probably post about some ideas pretty soon, but for now we’re just loving our new curtains.  Even little improvements make the biggest impact! If anyone has DIY stories, I’d love to hear them!